Choosing a team and adding members
A team is a shared space that brings together members, conversations, files, and tools. A channel is a section within a team dedicated to a specific topic, department, or project.
Viewing teams
- On the left side of the app, select Teams.
- Teams can display your teams in grid view or list view. The view setting is usually available in your profile settings.
- Grid view: shows all teams as cards.
- List: shows a collapsible list of teams and channels on the left. The original manual recommends this view.
Creating a team
- Open the Teams section.
- In the top right corner, select Join a team or create one, then click Create team.
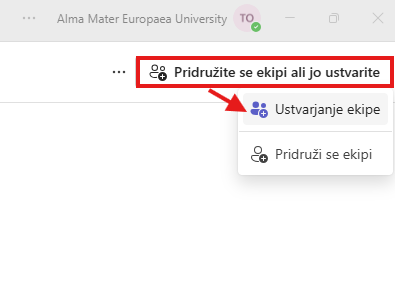
- Choose whether you want to create the team from a template, from another team, or from a group. If you do not already have a template, click Basic team.
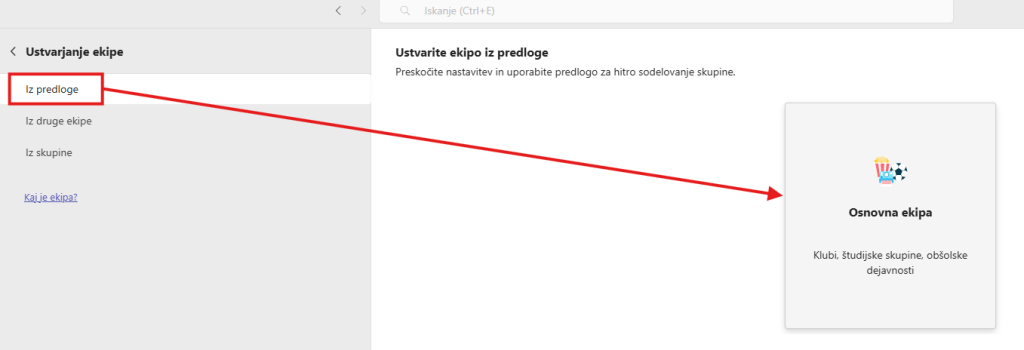
- Click Use this template.
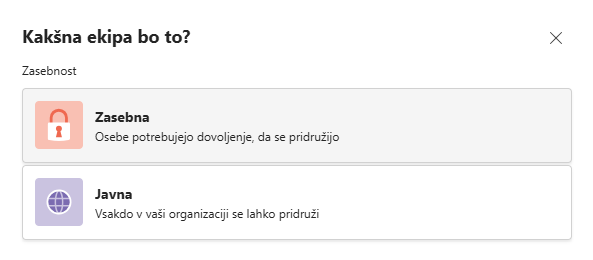
- Choose whether this team will be Private or Public.
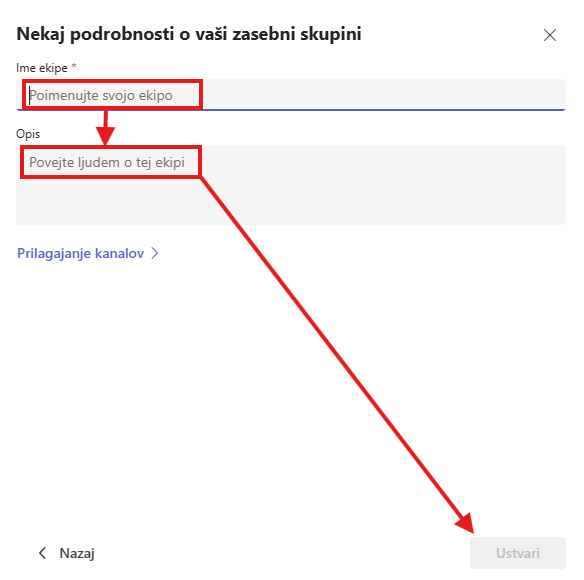
- In the last step, enter the Team name, add a Description if you want, and finally select Create.
Adding people to a team
- Open the Teams section.
- Next to the team name, click More options, usually shown as three dots (…).
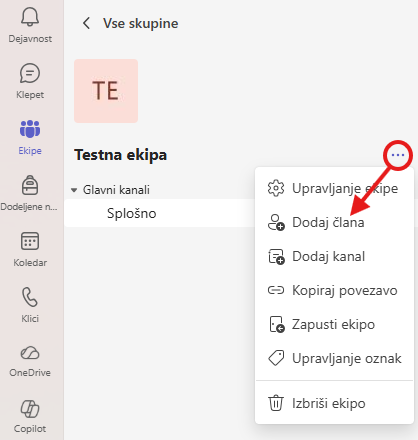
- Click Add member.
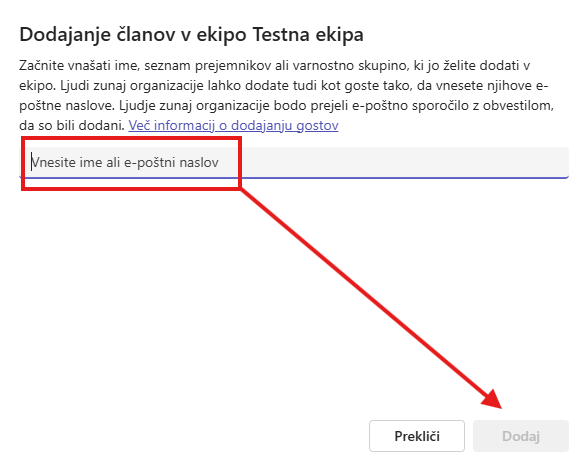
- Enter the person’s name and select them from the list of results.
- Click Add.
Team settings
Only the team owner can edit the team settings.
- Next to the team name, click More options (…) and select Manage team.
- Open the Settings tab.
In the settings you can, among other things:
- in the Team details section, change the name, the description, and whether the team is public or private (click Edit, then Done),
- change the team picture,
- set member permissions, for example whether they may create, edit, and delete channels, add apps, and delete their own messages,
- set guest permissions, for example whether they may create and edit channels,
- restrict @mentions for the whole team or for an individual channel,
- get a team code that lets other people join the team without a separate invitation,
- manage tags that let you mention a group of members at once.
Note: Some options can be restricted by the administrator at your institution, so they are not always available. Details: Manage team settings and permissions.
Channels and tabs
Teams are organized into channels and tabs. Conversations take place in channels, while tabs give access to files and other information.
Channels
Every team has subsections called channels. The General channel is created automatically. You can create additional channels for individual topics, working groups, or subcommittees. When there is new activity in a channel, its name is usually shown in bold.
Tabs
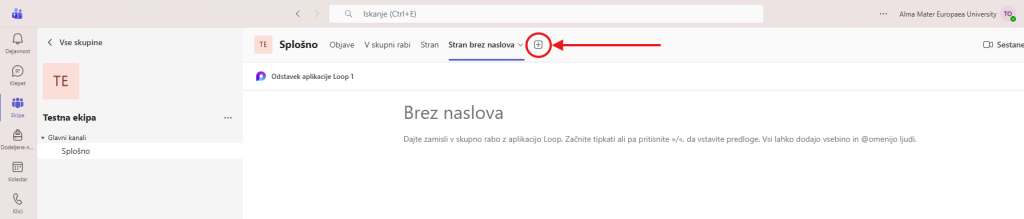
Every channel has its own tabs at the top. The original manual lists the Posts, Shared, and Page tabs. In newer versions the names may differ. You can also add other tabs and apps by clicking the + button.
Creating a channel
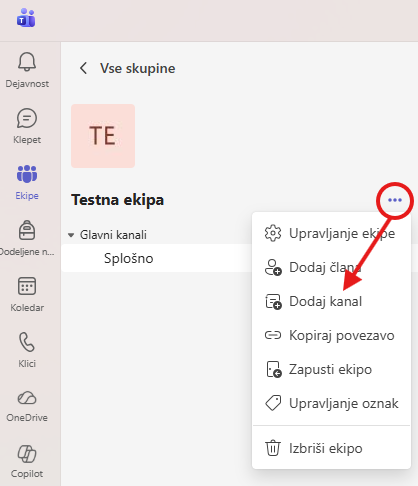
- Next to the team name, select More options (…).
- Select Add channel.
- Enter the channel name and description.
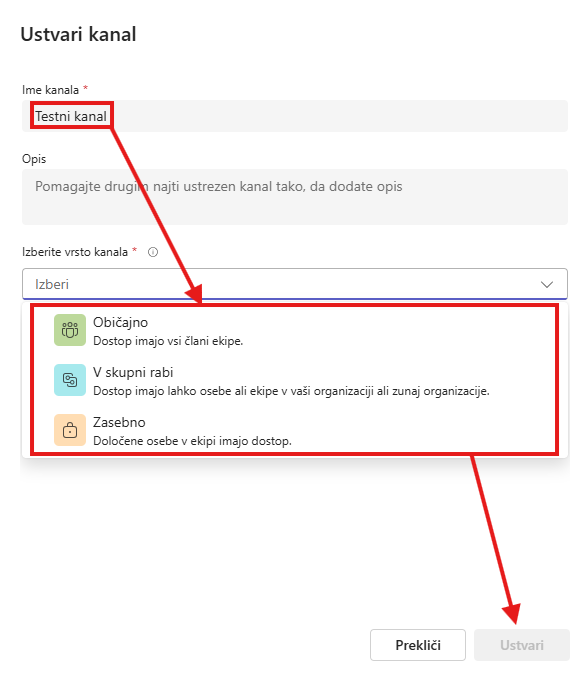
- Choose the channel privacy:
- Standard channel: visible to everyone on the team.
- Shared channel: can be seen by people or teams inside your organization or outside it
- Private channel: visible only to selected members. It is suitable for smaller groups or sensitive documents.
- Select Create.