
Meetings in Teams
The Calendar in Teams is connected to your Microsoft 365 calendar. A meeting scheduled in Outlook also appears in Teams, and vice versa. A meeting you schedule in Teams is automatically an online meeting.
Scheduling a meeting
You can schedule a meeting in several ways:
- In a channel: In the top right corner, select Meet now or Schedule a meeting.
- In a chat: Below the new message box, select Schedule a meeting.
- In the calendar: On the left side of the app, open Calendar. In the top right corner, select + New meeting or select a time range in the calendar. In the form, enter the meeting title, the attendees, the date, the time, and other details. If necessary, use the Scheduling Assistant to find a time slot that suits the attendees. When you are done, select Save. The invitation will be sent to the attendees’ Outlook mailboxes.
A meeting in a channel
- In the top right corner, select Meet now or Schedule a meeting.

- If you are scheduling a new meeting, a window opens where you have to fill in the required details, such as the meeting title, add required and optional attendees, and set the date and time of the meeting.
- In the Add channel box below the date and time, enter the name of one or more channels.
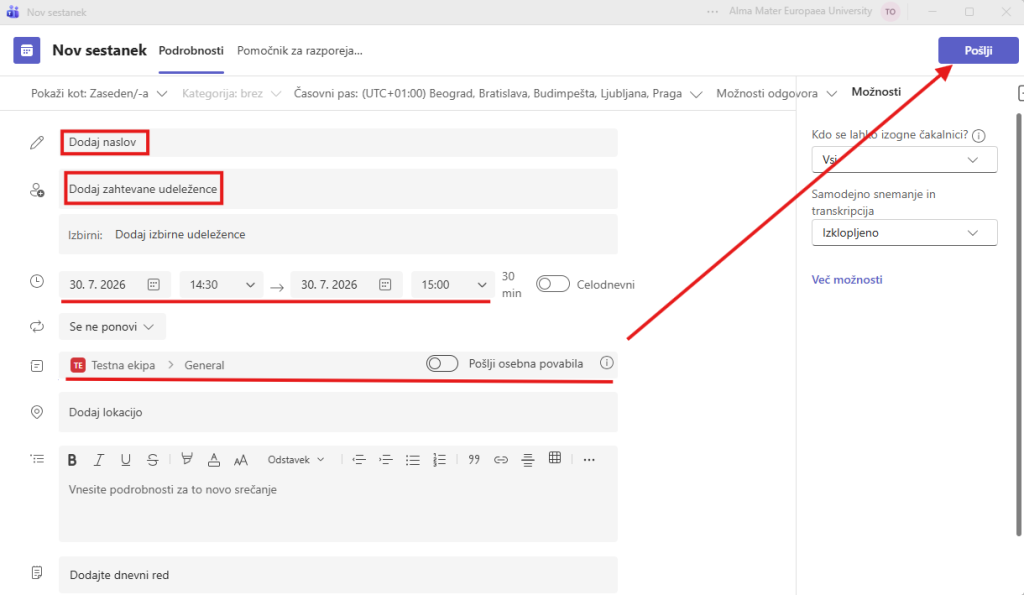
Visibility: A meeting in a channel is visible to all team members, and they can join it directly from the channel.
- The Join button usually appears in the calendar about five minutes before the start. Before you enter, you can check the camera and microphone settings.
Inviting people from outside the organization
You can also invite people from outside your organization to a meeting, even if they do not have an MS Teams license. You need their full e-mail address.
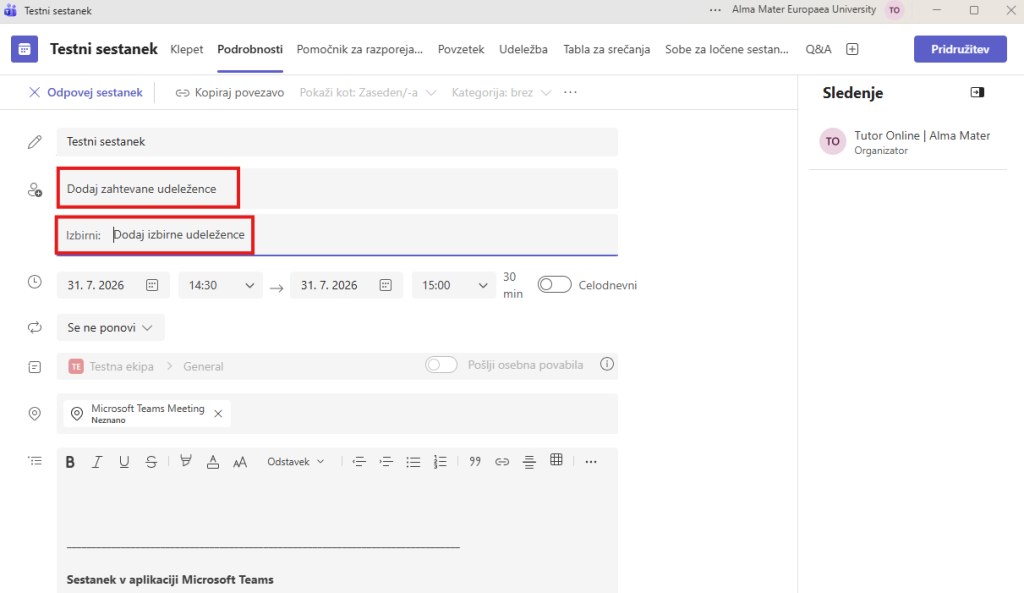
- In the Add required attendees box, enter the e-mail address. For an optional attendee, select Optional.
- Enter the full e-mail address, for example name.surname@example.com.
- Select Invite. The person will receive an e-mail with a link to the meeting.
Meeting options
The organizer can decide who can enter the meeting directly and who can present content.
- Open the Calendar.
- Select the meeting you want to adjust.
- Select Edit.
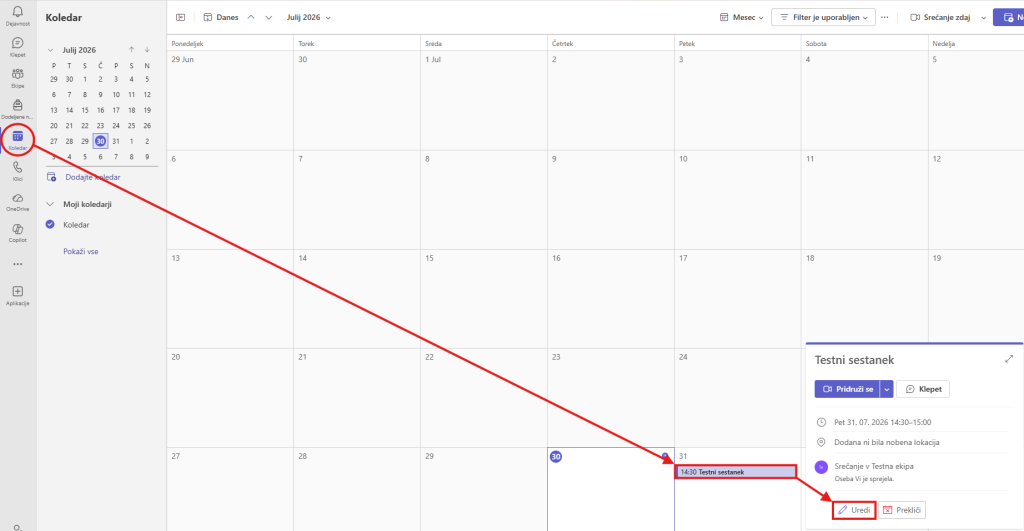
- On the page that opens, set who can bypass the lobby and who can present.
- Presenters can usually share content, mute or remove participants, and admit people from the lobby.
Joining an existing video conference or meeting
- Open the Join the meeting now link in the e-mail invitation, in the calendar, in the learning environment, or in a notice from the instructor. You can also join the meeting through the WiseTimetable schedule, where you find the lecture slot in question and click “Link”.
- Select Open Microsoft Teams or Continue on this browser. For the most reliable performance, we recommend the desktop app.
- On the screen before joining, check the selected microphone, speaker, and camera. It is advisable to test them before joining as well, by clicking Test mic and speaker.
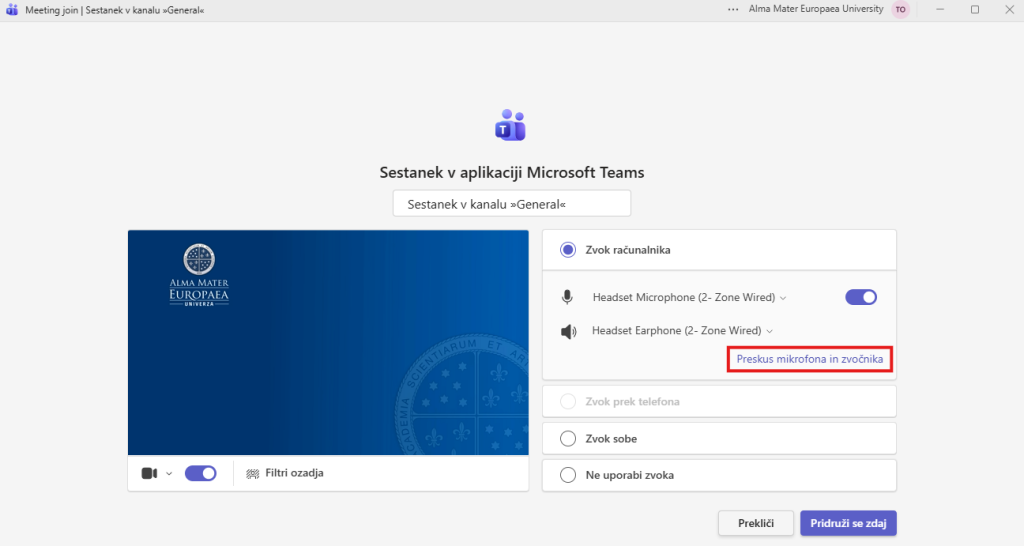
- As a rule, mute your microphone before entering. Turn on your camera if the instructor requires it or if it is appropriate for the meeting.
- Select Join now. If you enter the lobby, wait for the organizer to admit you.
Microphone, camera, and audio
- Microphone: select the microphone icon to turn the audio on or off.
- Camera: select the camera icon to turn the video on or off.
- Device settings: select the arrow next to the microphone or the camera, or go to More > Settings > Device settings, then select the correct microphone, speaker, and camera.
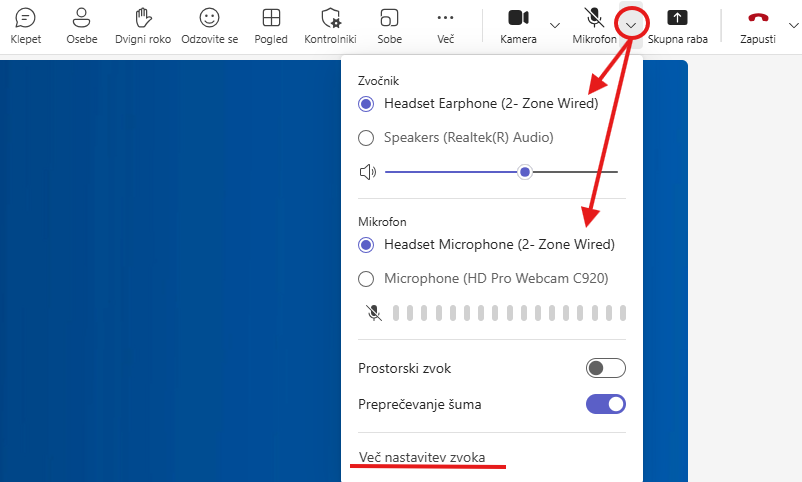
- During a lecture, keep your microphone muted until you speak. This prevents noise, echo, and interference.
- Using a headset with a microphone is recommended.
Changing the background on your video camera
- Select the arrow next to the camera icon and then choose a background.
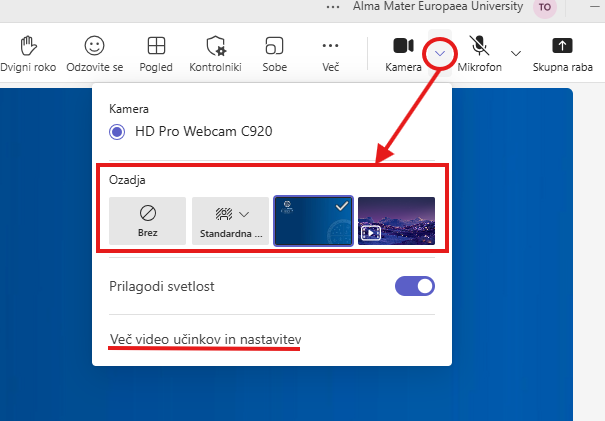
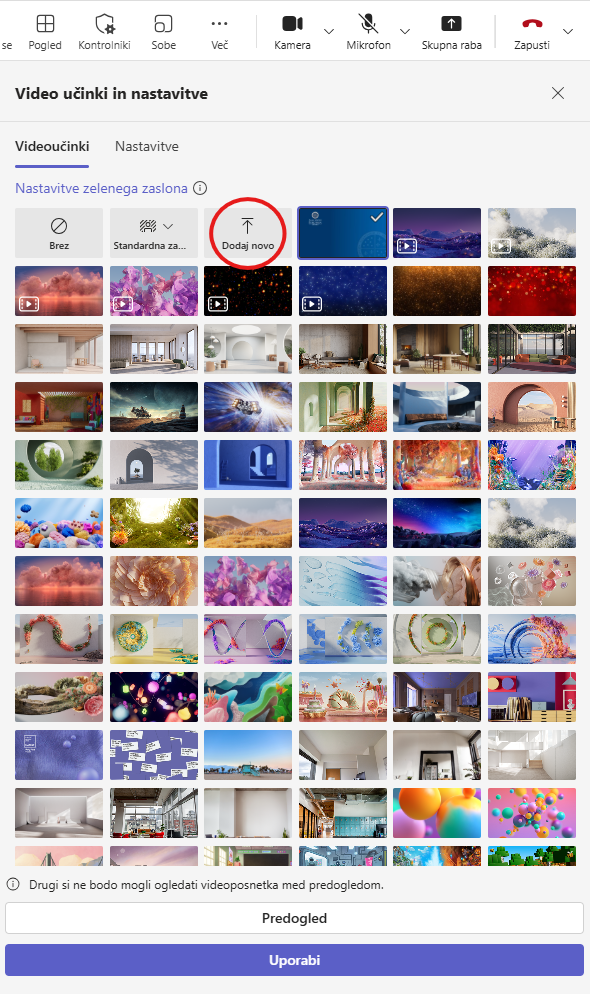
- Click More video effects and settings, where you have more options for choosing a background. If you want, you can also upload your own background.
Chat, reactions, and raising your hand
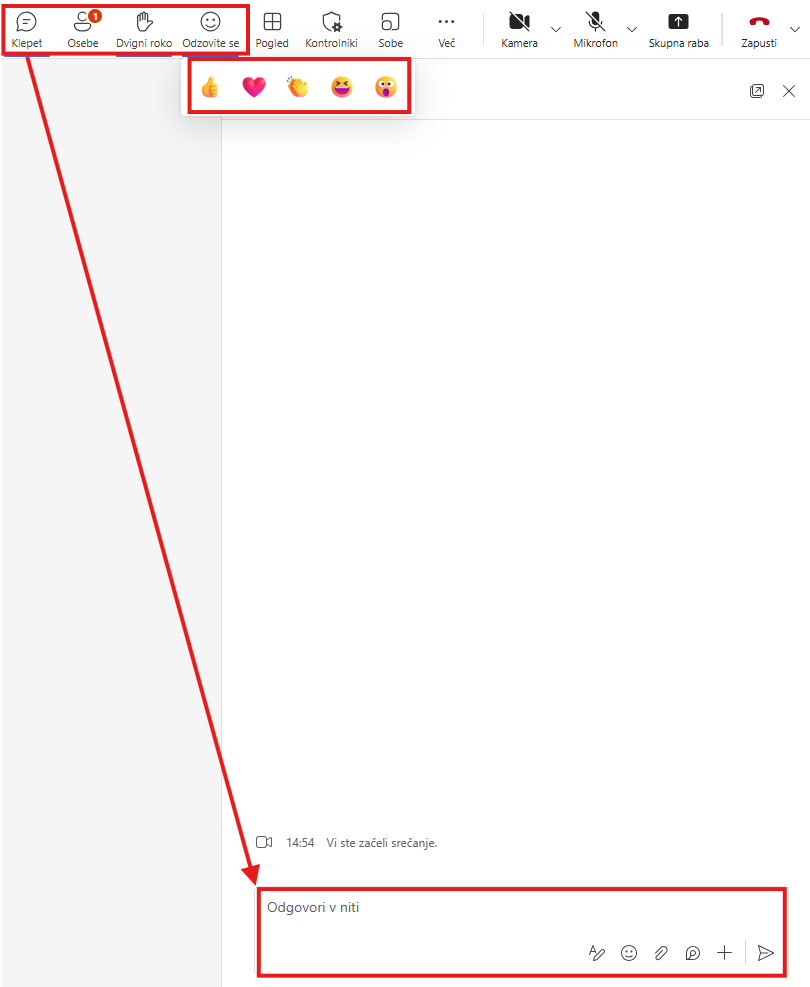
- Chat: select Chat, write a message, and send it. Messages may remain available after the meeting ends, depending on the organizer’s settings.
- Raise hand: select Reactions > Raise hand when you want to speak or ask a question.
- Reactions: use reactions such as like, applause, or heart when appropriate.
- When you finish speaking, mute your microphone again and lower your hand.
Sharing your screen or a presentation
- Select Share.
- Choose what you want to share: your entire screen, an individual window, or a PowerPoint presentation.
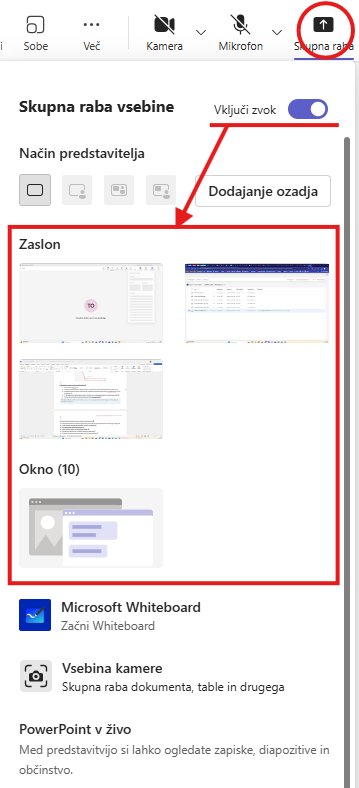
- If you are sharing video or audio from your computer, turn on the Include sound option if it is shown.
- Before sharing, close any documents and notifications that contain personal or confidential data.
- When you are done, select Stop sharing.
Limitation: A student can share content only if the organizer assigns them the presenter role or enables sharing.
Recommendations for a high-quality video conference
- Use a stable internet connection; if possible, a wired connection or a strong Wi-Fi signal.
- Check your microphone, speaker, and camera before the start.
- Mute your microphone when you are not speaking.
- Use headphones to reduce echo.
- Choose a quiet setting with adequate lighting for the camera.
- When sharing your screen, watch out for personal and confidential data.
Leaving a video conference
- Select the red Leave button.
- If the connection drops, open the meeting link again and join in the same way.

Was this article helpful?
Thanks for your feedback!